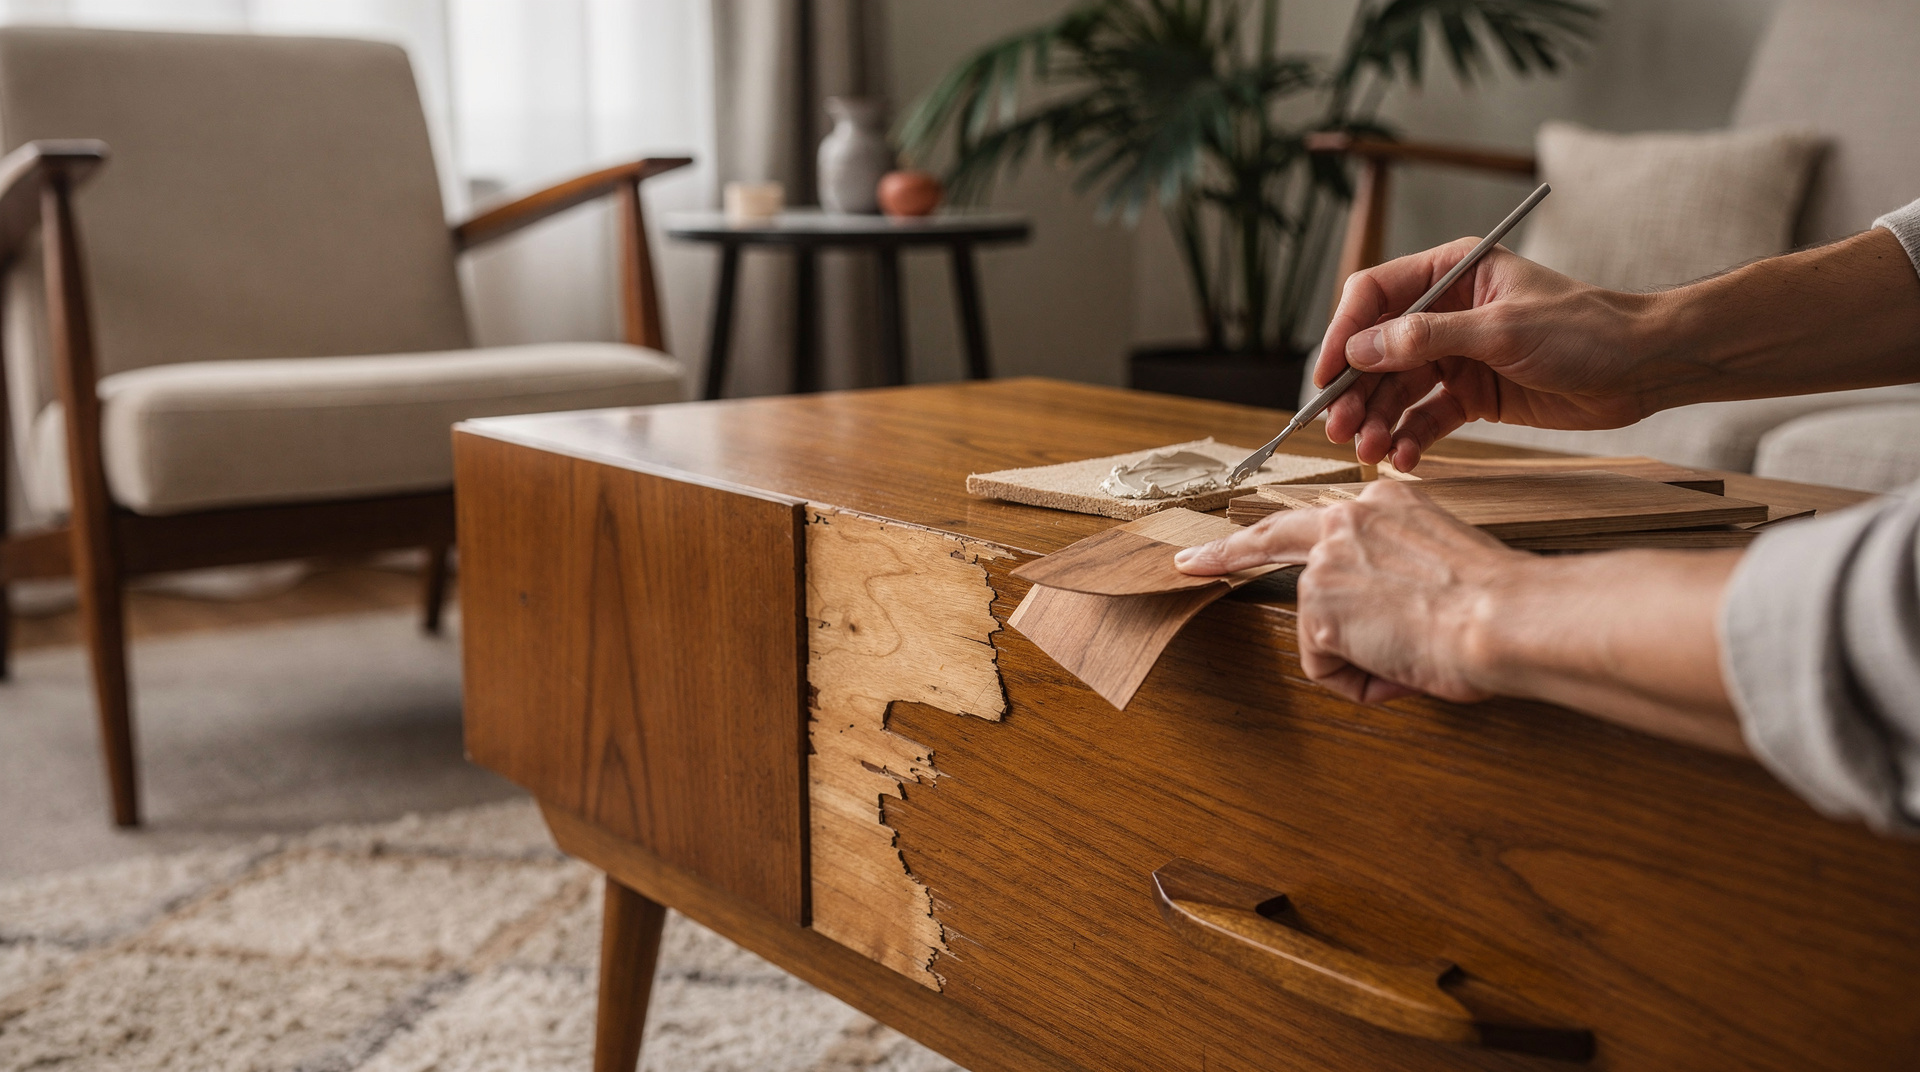
Repairing Veneer Damage: A Guide to Fixing Veneer Faces on Antique Furniture
Veneer is not a shortcut but one of the oldest techniques in high-quality furniture making. As far back as the Baroque era, thin sheets of precious wood were glued onto stable base constructions to showcase grain patterns and plays of colour that could never be displayed with such precision from a solid block. This tradition continues consistently into classical modernism and Mid-Century Modern: rosewood, teak, walnut or maple appear in the work of masters such as Finn Juhl, Arne Vodder or Florence Knoll almost exclusively as veneer on plywood or solid wood carcasses. Anyone who owns an antique or mid-century piece is therefore almost always working with veneer, and the question is not whether but how bubbles, chipped corners or missing sections can be professionally closed.
The following guide summarises the common repair approaches that have proven themselves in restoration practice. It is no substitute for a workshop or a restorer with provenance knowledge, but it gives you the foundation to realistically assess the condition, effort and limits of a repair. The underlying attitude is important: for a historically significant piece, the principle of minimal intervention applies. Reversibility, material-appropriate adhesives and respect for the patina carry more weight than a visually flawless surface.
1. Characteristic Materials and Their Behaviour
Mid-century veneers are generally between 0.6 and 1.5 millimetres thick — considerably thicker than today’s standard industrial material at around 0.5 millimetres. This material thickness is an important reference point for repairs: anyone patching a Rio rosewood veneer from the 1950s with a modern replacement veneer will almost always end up with a visible edge and a deviating sheen.
- Adhesive: Traditional workshops used hot glue based on bone or hide glue. This can be reactivated with heat and moisture, allowing bubbles to be closed without cutting. Later, white glues (PVAc) and urea resins were introduced, which are considerably more difficult to reverse. A simple test with a damp, warm cloth on an inconspicuous spot will often reveal which adhesive was used.
- Base materials: Mid-century carcasses are frequently made of beech or birch plywood, less often of particleboard. Bubbles most commonly arise from fluctuations in moisture, dried-out adhesive or mechanical stress at edges.
- Tools for repair: Veneer knife with a thin blade, veneer hammer, iron with adjustable temperature (approximately 70 to 90 degrees), baking paper as a release layer, cauls made of hardwood, clamps with soft jaws, retouching pens and shellac polish for the final colour matching.
For a closed bubble, it is often sufficient to slit it with a fine scalpel, inject warm hide glue with a syringe, warm it with an iron over baking paper and then press it with a caul and clamp. For missing sections, a precisely fitting replacement piece in the same veneer and grain direction is inserted, ideally with a diamond-shaped or irregular cut edge that disappears within the grain pattern.
2. Regional Schools and Designers Whose Veneer Work Demands Particular Care
Not every veneer is equally valuable, and not every repair is equally worthwhile. Anyone who owns a piece from a particular school should understand its material culture before reaching for the knife.
- Danish Modern: Workshops such as Niels Vodder, Johannes Hansen or A. J. Iversen, which worked for Finn Juhl, Hans J. Wegner and others, frequently used solidly glued edges with a visible veneer face on the surface. On sideboards by Arne Vodder or Kai Kristiansen, rosewood veneers in elaborate bookmatch or slipmatch arrangements are typical. Preserving the grain composition is crucial here.
- German and Swiss Post-War Modernism: Companies such as Wilhelm Knoll, Walter Knoll, Behr or de Sede frequently used walnut and cherry, generally with a calmer grain and a clear geometric band layout.
- American Studios and Serial Manufacturers: George Nakashima worked predominantly in solid wood, while Herman Miller and Knoll International used walnut and rosewood veneers for pieces by Charles Eames, George Nelson or Florence Knoll. The thinner, industrially produced veneers are more sensitive to moisture than handcrafted Danish work.
- Italian Modernism: In the work of Ico Parisi, Osvaldo Borsani or early Cassina series, fine walnut and zebrawood veneers often appear in combination with brass inlays, where repairs demand a particularly delicate touch.
3. Authenticity and Condition for Collectors
For the value of a mid-century piece, the way veneer damage is handled is decisive. An honestly preserved veneer with visible patina, small closed bubbles and a documented repair history is almost always preferable to a completely re-veneered piece. Collectors and curators pay particular attention to the following points:
- Originality of the veneer pattern: Bookmatch arrangements, edge banding and characteristic figuring should be retained. Large-scale replacement of veneer sections considerably reduces the collector’s value.
- Reversibility: If hide glue was used, any future restoration can build on that foundation. Two-component adhesives or synthetic resins on original substrate are to be viewed critically.
- Surface finish: Many pieces were originally oiled, soap-treated or polished with shellac. A thick layer of polyurethane applied as a repair measure destroys the material feel and is virtually irreversible.
- Documentation: Invoices, restoration reports, manufacturer’s marks and stamps belong to the piece. On Danish furniture, the branded marks of cabinetmaker workshops or inspection marks from the Møbelfabrikanternes Kontrol are frequently found.
A visible, well-executed repair is not a flaw. An over-restored piece of furniture, on the other hand, loses what defines mid-century design: the trace of making, of use and of time.
At mid-centurydesigns.com, we examine every piece with regard to condition, original veneer, adhesive history and provenance before it is accepted into our inventory. We document known repairs transparently, identify missing sections and work with specialist restorers who act in the spirit of reversibility. This allows you to decide which piece of furniture you take on in its naturally aged condition and which one will receive careful restoration before delivery.